

Nicholas Morris
on 26 August 2025
Allow-listing web traffic – blocking all web traffic that has not been pre-approved – is a common practice in highly sensitive environments. It is also a challenge for developers and system administrators working in those environments. In this blog, we’ll cover an easy way to mitigate this challenge by using LXD to generate allow-lists.
The problem
Many applications, tools, and websites pull packages, configurations, and other data from domains that the end user never sees, unless they happen to monitor the associated network traffic. Trying to perform a new operation in an allow-listed environment usually follows an unfortunate pattern:
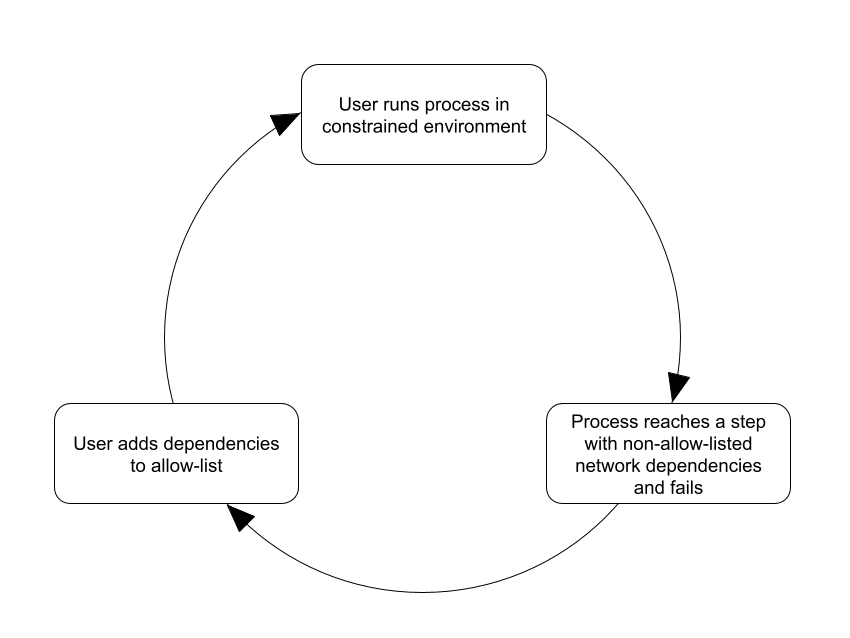
- User runs process in constrained environment
System administrator or developer attempts to run a software installation, ETL pipeline, or other process inside an environment that implements network allow-listing. - Process reaches a step with non-allow-listed network dependencies and fails
Even if the user has added known dependencies to the allow-list, such processes will fail when they attempt to connect to additional, previously unknown dependencies. - User adds dependencies to allow-list
The administrator or developer adds newly-discovered dependencies to the allow-list - Repeat
This pattern often requires several iterations because processes do not connect to all of their network dependencies simultaneously. Frequently, they exit on the first failure. Fixing that failure allows the process to reach its next step with a network dependency, leading to another failure – and so on.
The solution
The best method to avoid this ‘vicious cycle’ of allow-listing is to pre-identify all required resources by executing your process in an unconstrained environment while monitoring network traffic. After the process has been executed start-to-finish, an allow-list can be generated from network logs with confidence that the result includes all required resources.
In the context of domain-based allow-listing, DNS logs are the most direct method of monitoring – and, fortunately, Canonical’s LXD makes it easy to create a test environment with DNS logging.
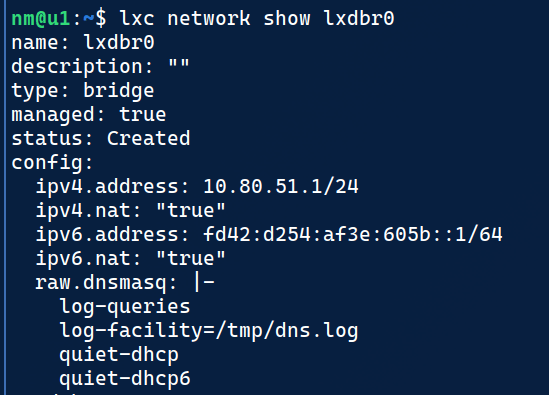
When setting up LXD with default configurations (lxd init --minimal), LXD will create a managed bridge network. This network type supports DHCP and DNS with no extra configuration. LXD does this by running an instance of dnsmasq in the background.
Even better, LXD allows us to customize the configuration of the dnsmasq server via the raw.dnsmasq configuration option. The relevant configuration options for our use case are:
log-queries– log DNS querieslog-facility=<filepath>– write logs to the specified filepathquiet-dhcp– suppress standard DHCP loggingquiet-dhcp6– suppress standard DHCP6 logging
How-to
- Install and initialise LXD by following the official tutorial
- Verify that a managed network has been created
lxc network ls --format json | jq -r '.[] | select(.managed) | .name'The returned names are managed networks. If the command does not return any output, create a new managed network with lxc network create YOUR_NETWORK_NAME
- Configure the managed network
lxc network set YOUR_NETWORK_NAME raw.dnsmasq "$(echo -e 'log-queries\nlog-facility=/tmp/dns.log\nquiet-dhcp\nquiet-dhcp6')"- Verify your managed network looks correct with
lxc show network YOUR_NETWORK_NAME
- Create a virtual machine or container using this network
lxc launch ubuntu:24.04 dnstest -n YOUR_NETWORK_NAME- Execute DNS queries within the resource
lxc exec dnstest -- su ubuntu
nslookup google.com
nslookup canonical.com- Exit the virtual machine or container and search the dns.log file for DNS A and AAAA query logs:
sudo grep -oP 'query\[A+\]\s\K\S+' /tmp/snap-private-tmp/snap.lxd/tmp/dns.log | sort -uConclusion
By following this process, one can generate a complete list of domains used by any process executed within an LXD virtual machine or container. That list of domains can be formatted as an allow-list configuration file, avoiding the iterative cycle all too common with manual approaches.


